How to Enable a Let’s Encrypt Free SSL in Cloudways Hosting
Last Updated: November 20, 2016 SSL, Web security

Enable a Let’s Encrypt Free SSL in Cloudways Hosting
HOW TO ENABLE A LET’S ENCRYPT FREE SSL IN CLOUDWAYS HOSTING
Cloudways, a Manage Cloud Hosting Provider with Powerful Hosting, features Check Cloudways WordPress Hosting
Today tutorial we are going to see about How to enable a Let’s Encrypt Free SSL in Cloudways Hosting
Just follow our Below steps to Install Let’s Encrypt Free SSL Certificate in Cloudways
- Login to your Cloudways project console
- In the Top Menu Bar, you can Find the Applications Just Open Application

- select your Application in Application Manager that your want to Install Let’s Encrypt Free SSL
- Now Open that Application
- Open SSL Certificate in the Application Management
- Now it shows the SSL Installation form
- Just Fill the SSL Installation form
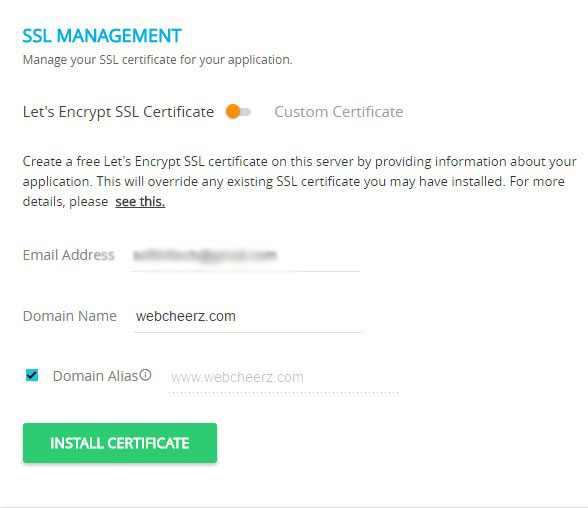
- Click Install Certificate to Activate Let’s Encrypt free SSL
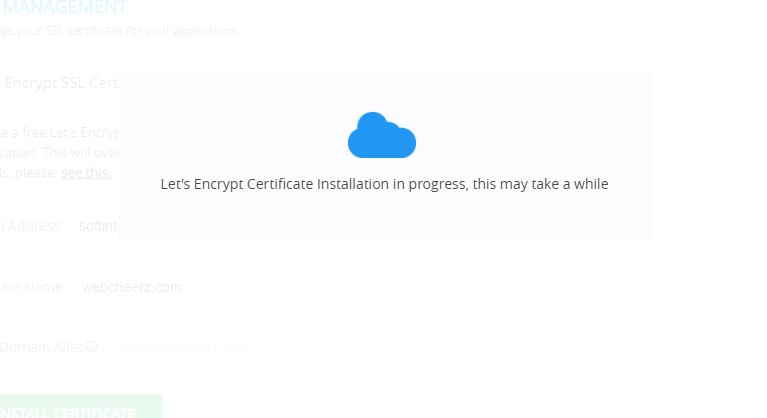
- That’s all Successful we install a Let’s Encrypt SSL for our blog/website in Cloudways
- Cloudways Have auto-renewal option, so your SSL certificate will Renewed Automatically After 89days
- You can also Remove the SSL for you Application anytime by Just click the Revoke button to remove/delete your SSL certificate
IMPORTANT STEP
Force SSL redirect we can add a .htaccess rule for force SSL redirect in both WWW and NON-WWW version.
- Add this Below code on your HTACCESS File
RewriteEngine On
RewriteCond %{HTTP:X-Forwarded-Proto} !https
RewriteRule ^(.*)$ https://%{HTTP_HOST}/$1 [R=301,L]
SSL CHECKLIST
If you Any Doubts and Queries related to SSL Installation Feel Free to comment here, I will guide you.
Comments
Post a Comment